Whether you're in the mood for a pop of color and splash of design or a classic look such as a French manicure, you can achieve these looks with just a few quick items and steps. What's even better is that you can achieve these looks in the comfort of your home! Precision and expertise isn't a must so don't be intimidated by these fast and fashion-forward looks. To keep it simple, I will start with a clean and classic French manicure. Even this style is easy to dress up with color prints and sparkling rhinestones!
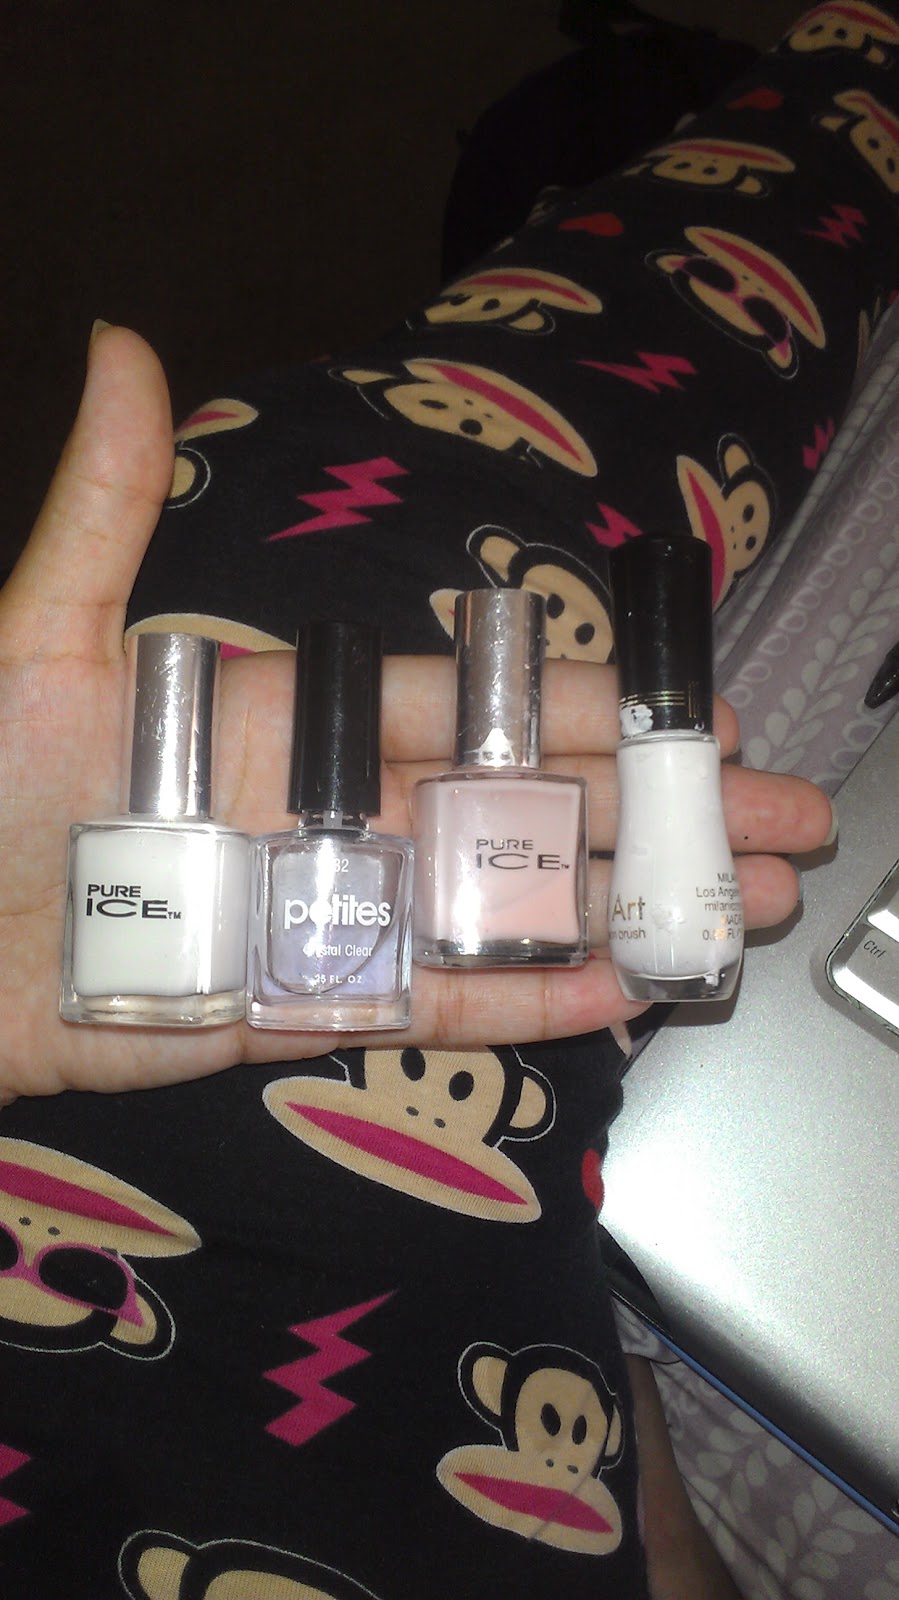
All you need to start for a French manicure is a sheer pink to enhance the natural color of your naked nails, white polish for the nail tips, if you have long nails, and white polish with a nail art brush for shorter length nails and also for touch ups, and last but not least, a clear coat for shine. I included a picture to show what I personally used to get my look in the picture shown below and also clarify anything regarding the brands.
 First, start by cleaning any excess polish from your nails and cleaning up the cuticles of your nails. If need be, file and shape your nails to an even length to improve the overall quality of the finished look. After all, you are trying to go for that fresh from the salon look.
Next, go over your nails with the sheer pink of your choice, starting with just one coat. I used Pure Ice brand in Tickle Me Pink because its just the perfect opacity without being too pink and it dries in a snap.Let both hands dry completely before starting your white tips. It shouldn't take longer than fifteen minutes for one coat.
If you have long nails, use a thin coat and paint your tips with the plain white. For this, I also used Pure Ice brand. If your nails are short, you can get buy with just using a white polish with a nail art brush such as Milani Nail Lacquer in White Canvas. It comes complete with a precision brush for hitting all the right angles. Perfect for French manicures, in my opinion.
Outline the arch where the nail length starts from the nail bed with the white to complete the tips and get any spots that you may have missed. Remember, you don't have to have hands like a surgeon to get a great result. There is really no science to it either so don't get worked up and discouraged. Practice makes perfect! Let dry as long as needed, about thirty minutes or so, or until the tips are no longer tacky to the touch.
 Lastly, go over all your nails with a clear coat to seal in the colors and add a boost of shine. You can also stick a few rhinestones on whatever nails you choose to amp up the manicure or use a toothpick to add dots, swirls, or even design a print! Moisturize those hands with your favorite hand lotion and you're ready to go!
Getting this straight from the salon look shouldn't cost no more than $10 if you already have a few basic items on hand. The best part is that you get to show off those beautiful NATURAL nails and paying next to nothing for it. The polishes I used were VERY affordable and held up great for well over a week, maybe two. They're even available in almost any store that sells cosmetics and beauty products. Can you imagine going out for a French manicure for less than $10? I don't think I can.
So if you're in a hurry and need a quick nail outfit, or you just need to dress up those fingers, what's a better option than to do your own French manicure that you created YOURSELF in your own home!
No comments:
Post a Comment